Search This Blog

Wednesday, March 31, 2010

Scoops of Sunshine - Easter Ice Cream


This post is dedicated to my little niece Laila (8 months). This will be her first Easter -- she's not quite old enough yet to eat ice cream; but when she is, I would definitely make this again for her.

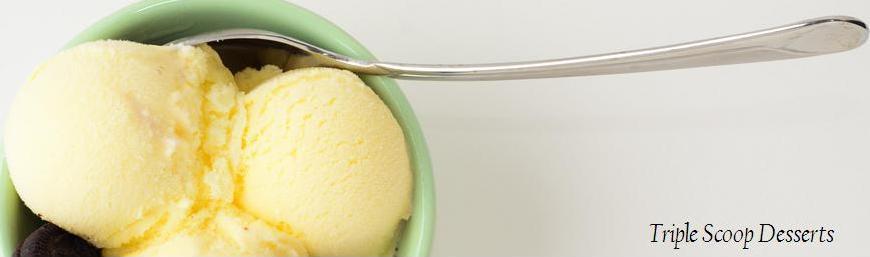
My latest creation is a Lemon Kiwi Ice Cream with a Strawberry-Blackberry-Blueberry Reduction. The lemon kiwi ice cream is a great flavor for any sunny spring day...it is light and refreshing. It is not very tart, as I try to add just the right amount of lemon juice to let you know that it is there but not sour enough to make your mouth pucker. The kiwi fruit was paired with the lemon ice cream to bring in some extra sweetness, so that I wouldn't have to use that much sugar.


The berry reduction is very simple sauce. I used 1 cup of mixed strawberries, blackberries and blueberries. If you can find them fresh it is always preferred; but, a frozen fruit mixture would work just as well. I added a 1/2 cup of water to the berries into a small saucepan and let it reduce over a gentle low heat. Once it achieved a nice syrup consistency, I refrigerated it until it was ready to be combined with the lemon kiwi ice cream.

I also made a some some fresh waffle bowls and waffle rolls. I enjoy eating ice cream with a little crispy texture and the waffles were just the right touch. The fresh waffles gave the house a wonderful aroma of caramelized butter and vanilla. I would suggest making the waffle bowls or rolls a few hours before serving the ice cream. My experience is that they will get a bit soft if left overnight.

Here is the recipe for the Lemon Kiwi Ice Cream:
3 egg yolks
2 cups of heavy cream
1 cup of whole milk
1/2 cup of lemon juice
Zest of 1 medium lemon
1 large chopped kiwi
Pinch of salt
1/2 cup of sugar

Combine half of the cream, milk, lemon zest, salt and sugar. Bring to a low boil, temper the eggs with the warm mixture and the then bring back to a low boil or 170 degrees. Place ice cream base into an ice bath and then add the remainder of the heavy cream, chopped kiwi and the lemon juice. Let cool and then refrigerate for at least 4 hours. Before placing the base into the ice cream machine pour it through a fine mesh strainer to remove the lemon zest and kiwi. Follow your ice cream maker instructions.

Once the ice cream is ready, get out your berry reduction sauce and alternate scooping the ice cream and the reduction into a container. Once filled, use a chopstick, bamboo skewer, or just a long clean skinny stick to stir the ice cream and berry reduction once or twice to create a swirl. Let the finished ice cream "age" for at least 4 hours in the freezer and then serve with fresh fruit and a waffle bowl.  You could also create other shapes with the waffle while it is still warm, by rolling it or using a cookie cutter.  Arrange on a plate or in a bowl with the ice cream and fresh fruit for garnish.

(I might change the recipe a little bit next time and reduce the lemon juice over a low heat, as I think the extra water made the ice cream a bit icy.)

Waffle Recipe:
2 large eggs
3/4 cups of sugar
2 tbsp of melted butter
2 tbsp of pure vanilla extract
1/4 cup of heavy cream
1/3 cup of all purpose flour

Combine all the ingredients into a mixing bowl. It should be a similar consistency as for pancake mix and not too runny. If it is too runny just add a little more flour to thicken. Place a non-stick skillet on a medium-low heat. Once the skillet is heated, add a little cooking spray so that the waffles will be easier to flip. For the waffle bowls, I scooped a 2/3 cup into the skillet and swirled it around to form a very thin 8-9 inch circle. If you are making waffle rolls, I would scoop 1/4 cup to form a 5-6 inch circle. Let the waffle cook to a golden brown, then with a spatula loosen it from the pan and flip it over and cook the other side to an equal golden brown.

To make a waffle bowl, place the hot waffle over an inverted small bowl/ramekin. Mold the warm waffle lightly over the bowl and let cool. To make the waffle roll just place the hot waffle on a cutting board and roll gently and let cool.


Spring is in the air. I hope everyone has a wonderful Easter. If you have kids, may the Easter Bunny bring them baskets filled with treats and maybe a Scoop of Sunshine?

I'll have more spring flavors for you next week, so come back to check it out!

Thank you for all the positive feedback!

Bao

Wednesday, March 24, 2010

Walnut-N-Chip Ice Cream

Walnuts. What do you do with a costco size bag of walnuts? Well, if you're me, you make ice cream of course.


I have been craving a traditional Chocolate Chip Ice Cream, but I wanted to incorporate the walnuts into it as well. There is something so delicious and simple about the combination of sweet cream and bits of dark chocolate. The sweet cream with a hint of vanilla envelopes your mouth and embraces it with a warm flavor, then the pieces of dark chocolate begin to melt and blend in with the cream to create an irresistable combination. Now add in the crunchy and toasty flavor of little walnut pieces and it brings the Chocolate Chip Ice Cream to new heights...along the lines of one of my all-time favorite ice creams Mint-N-Chip...I've named this version Walnut-N-Chip.


This ice cream reminds me of eating chococlate chip walnut cookies. I'm sure this ice cream would go great with at nice hazelnut latte or steamy hot chocolate.


The recipe for this Walnut-N-Chip Ice Cream:

3 egg yolks

1 1/2 cups of milk

1 1/2 cups of heavy whipping cream

1/2 cup of sugar

2 tsp of pure vanilla extract

Pinch of Salt

1/2 cup chopped walnuts

1/2 cup of your favorite dark chocolate

In a sauce pan on medium high heat add your milk, heavy whipping cream, sugar and salt. Stir this until it comes to a low boil. Next temper the eggs with the warm cream. Once you have 3/4 of the warm cream tempered, pour it back into the saucepan and bring the ice cream base to a low boil or 170 degrees. Pour the ice cream base in a bowl and place into an ice bath. Add your pure vanilla extract and let the ice cream base cool and then refrigerate for at least 4 hours.

Follow your ice cream maker instructions to make the ice cream. Toast the chopped walnuts so that the oil in the nuts are revived. Let cool. In the mean time, chop the dark chocolate into little pieces so that the are easy to eat. You can leave them chunky if you like to chew on your dark chocolate...I like mine to melt in my mouth. Once the ice cream begins to solidify, add the toasted, chopped walnuts and dark chocolate chips. When the ice cream is finished, place the ice cream in the freezer for 4 hours so that it can age. Then enjoy your delicious creation.

Let me know if you have any questions. I'll reply to any comments that you leave.

Thank you so much for stopping by.

I'll see you next week for my Easter Ice Cream post!!

Bao

Tuesday, March 16, 2010

For St. Patrick's Day -- Godzilla's Favorite Ice Cream!!


How is that for a catchy title? Well, if Godzilla had a favorite ice cream, I'm thinking it would be my Green Tea and Toasted Coconut ice cream....I've even added some homemade green tea mochi to top it off! Now what 20,000-ton Japanese mutant dinosaur wouldn't like that?


This is a great, refreshing green tea ice cream with bits of shredded toasted coconut and a hint of coconut milk. For those of you who are not fans of green tea because of it earthy flavor, the coconut milk in this recipe tones down the earthy flavor and sweetens the ice cream up a notch. The little pieces of toasted coconut will give your mouth something to chew on once the ice cream has melted on your tongue.


I also made some green tea mochi. You can serve this on the side or right on top of the ice cream. It adds a little sweetness from the sticky rice and just a bit of green for color...in celebration of St. Patrick's Day.


Green Tea and Toasted Coconut Ice Cream Recipe:

1 ½ cups of heavy cream
½ cup of coconut milk
½ cup of whole milk
6 tsp of matcha (sweet green tea)
½ cup of sugar
Pinch of salt
3 egg yolks

Mochi Recipe:

Adapted from Asian Dumplings Tips by Andrea Nguyen

2 1/4 cups of Blue Star brand Mochiko Sweet Rice flour (made by Koda Farms)
3/4 cup sugar
2 1/4 cups water
Tapioca or potato starch
2 tsp of matcha (sweet green tea)

Mix the sweet rice flour, sugar, water and matcha together. Pour 1/3 of the mochi mix into a microwave-safe bowl, cover with plastic wrap and microwave for 1 minute. Stir and then microwave for 1 more minute.

Place hot mochi on a cutting board with plenty of tapioca starch on the bottom and top. Roll flat and cut into small pieces.


I've heard Green Tea Ice Cream goes well with a Guinness too!

I hope you enjoy your St Patty's Day!

Cheers!

Bao
Related Posts Plugin for WordPress, Blogger...

Copyright

All photography and written text on all our sites are Copyright of Triple Scoop Desserts ©2007-2018, unless otherwise noted. Material may not be duplicated, published or re-written without permission. All rights reserved